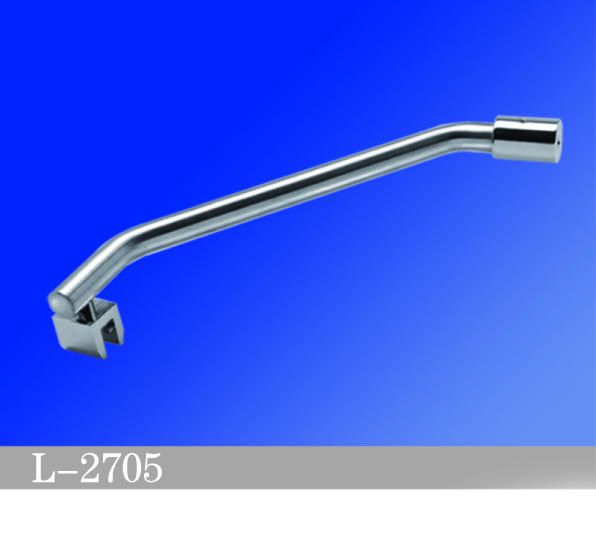
Adding the shower enclosure support bar can make your bathroom safer and more flexible. In your bathtub or shower area, shower panel support bars and brackets provide additional safety against slipping and falling. This article will show you a general installation method for round tube shower support bars/square tube shower support bars.
The tools needed for installation are a hammer, a level, some applicable drill bits, and stud sensors (optional). Your support bar for shower will be solid if you secure it to the double-headed studs.
Step 1: Mark the stud locations
Use the stud sensor to find the studs near your proposed location for the shower enclosure support bar. Make a light pencil mark in the center of each stud. In general, the bottom of the shower rod should be about 32 inches to 38 inches above the floor.
Step 2: Mark the side of the studs
Locate the edge of the studs by probing with a finished nail. Punch a series of holes in inconspicuous locations, such as on top of a tile, and mark both edges of the studs.
Step 3: Transfer stud locations to tiles
Use a level to extend the stud marks down to the position of the support bars for bathroom. Place a 1-1/2-inch strip and masking tape on the tile to indicate the studs.
Step 4: Place the support bar over the studs
Select the correct installation position of the round/square tube shower support bars according to the specific situation, especially when installing bars for the disabled/injured/elderly. If the shower panel support bars and brackets are in the wrong position, it is useless even if they are securely fastened. At least two screw holes align with the studs. Then mark each hole with a grease pencil.
Step 5: Drill into the studs
Use a glass-and-tile bit to drill 1/8-inch holes closest to the center of each stud to confirm the stud location. It is better to drill the rest of the hole if you hit solid wood. If not, poke a bent wire through the hole and probe until you feel the stud. Reposition the support bar for shower and mark the hole.
Step 6: Caulk the installation flange
Caulk the back of the shower rod mounting flange with tub and tile adhesive or silicone caulk.
Step 7: Attach the shower enclosure support bar to the wall
Screw the shower enclosure support bar to the wall with stainless steel pan head screws. They should penetrate the studs at least 1 inch.
Step 8: Check for Firmness
The above steps will help you install a support bar for shower near the edge of the tub, but it doesn't end there - try pulling hard on the support bars for bathroom to test if the installation is secure.
Conclusion
Working with a professional bathroom hardware manufacturer to get high-quality shower enclosure support bars is crucial for long-lasting. Please feel free to contact us for further details about support bars for bathroom!