Everything You Need to Install a Frameless Glass Shower Door Like a Pro
Frameless glass shower doors are the epitome of contemporary bathroom elegance. Sleek, minimal, and remarkably modern, these enclosures amplify spatial aesthetics while maintaining a practical barrier against water spray. Their popularity is not merely cosmetic—these doors promise a refined bathing experience and can even enhance property value.
But installing one? That’s a different kind of art. Precision is non-negotiable, and the margin for error is razor-thin. Mastering the process requires a blend of architectural awareness, the right set of tools, and an unshakable attention to detail.
Planning & Preparation
Measuring for Precision
Before you lift a drill or order glass, measurements must be exact. Begin by taking height and width readings at multiple points—top, middle, and bottom. Rarely are bathroom walls truly square. Record all variances and work with the narrowest width to avoid catastrophic misfits.
Evaluating Wall Conditions and Stud Locations
Frameless systems rely on anchoring into stable substrates. The drywall won’t suffice. Locate wall studs using a digital stud finder. If your walls are tiled, ensure backing materials—preferably wood or metal studs—are behind the anchoring points. This determines whether hinges or clips can securely bear the glass's weight.
Choosing the Right Glass Thickness and Type
Typical frameless shower doors use tempered glass ranging from 3/8 inch (10mm) to 1/2 inch (12mm). While 3/8 inch offers a sleeker profile, 1/2 inch provides more stability. Opt for tempered safety glass—it shatters into dull pebbles rather than jagged shards, reducing injury risk.
Essential Tools & Hardware
Core Installation Tools
Your toolbox should include:
A laser level for dead-accurate alignment
Diamond-tipped drill bits for tile and stone
Silicone sealant (mildew-resistant)
Screwdriver set and power drill
Measuring tape and pencil
Forget the laser level, and you’ll introduce gaps that ruin the seal and the silhouette.
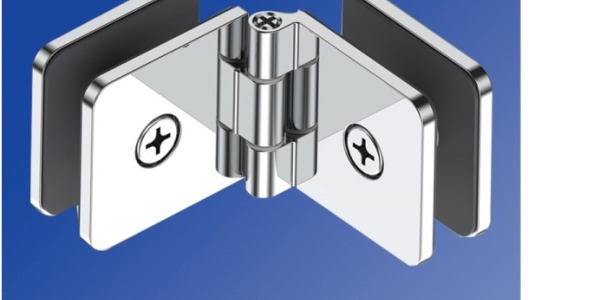
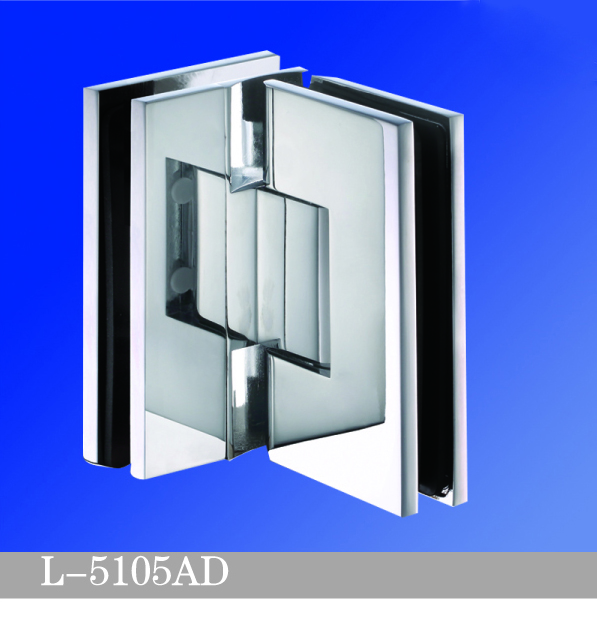
Key Glass Hardware Components
At the heart of the installation lie discreet yet critical pieces:
Wall-mount hinges: Support swinging doors with precision pivoting
Glass-to-glass clips: Secure fixed panels without metal frames
U-channels: Create a subtle anchoring groove for stationary panels
Clear polycarbonate seals: Channel water back into the enclosure
Choose marine-grade stainless steel or brass-based hardware with corrosion-resistant finishes. It ensures longevity in moisture-prone environments.
Safety Equipment You Must Not Overlook
Tempered glass is heavy and slippery. Arm yourself with:
Suction cup glass lifters
Cut-resistant gloves
Safety goggles
Knee pads
The glass will not forgive mistakes. One slip could end in shattered panels—or worse, bodily injury.
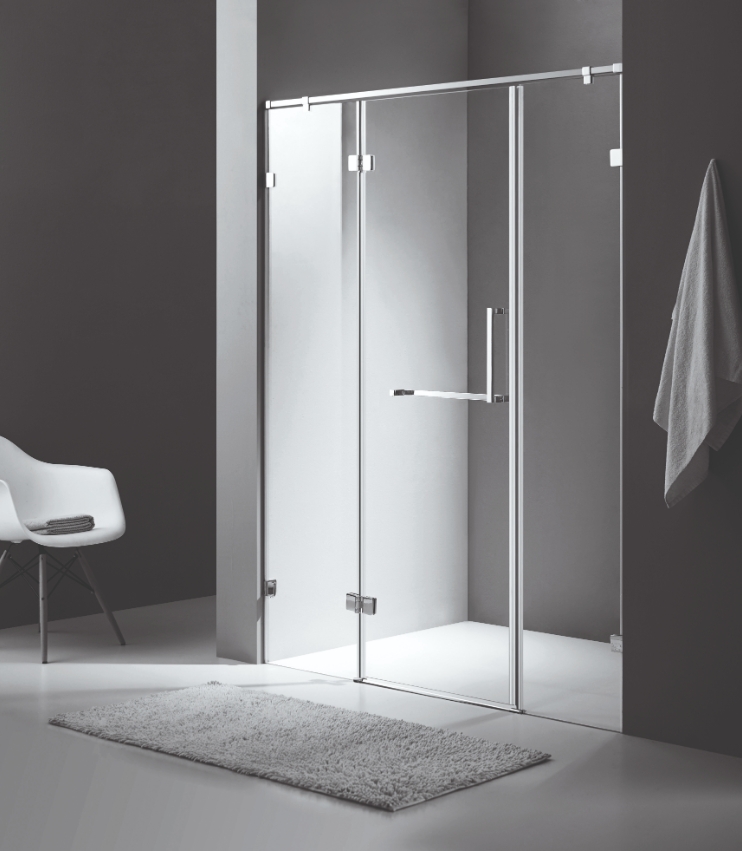
Shower Hinges With Covers For Frameless Shower Glass Door
Installation Process, Step by Step
Marking and Drilling with Absolute Accuracy
Once you’ve aligned the glass dimensions and determined hinge locations, use painter's tape to mark drill points. Place a plastic anchor into drilled holes for a firm grip. Never drill without a guide—diamond bits can skate across tile if not steadied.
Handling and Mounting the Glass Panels
With suction lifters, lift the fixed panel into position. Insert into the U-channel or fasten with clips. For the door panel, attach hinges to the wall, then lift and bolt the door to the hinges with meticulous care. Ensure the gap between the door and fixed panel is uniform—typically between 1/8" to 3/16".
Sealing, Leveling, and Final Adjustments
Apply a clean silicone bead along all seams where the glass meets the tile. Use a finishing tool to smooth the sealant. Adjust hinges to align the door perfectly and test open-close movement. Check for friction, dragging, or misalignment and fine-tune accordingly.
Post-Installation Best Practices
Leak Testing and Waterproofing Checks
After 24 hours of curing time, run a controlled water test. Spray water toward all glass joints and seams. Look for leaks, especially near hinges and base channels. Reapply sealant if necessary.
Maintenance and Cleaning Tips for Long-Term Clarity
Hard water stains are the enemy. Use a squeegee after every use. For cleaning, apply a pH-neutral glass cleaner. Avoid ammonia-based products—they corrode hardware and leave streaks. Apply a water-repellent coating quarterly to keep buildup at bay.
Common Mistakes and How to Avoid Them
Skipping level checks: Doors that sag are often installed without frequent use of a level
Drilling too deep: Penetrating waterproof membranes leads to slow leaks and mold
Improper sealant application: Weak seals invite water intrusion and glass instability
Avoid shortcuts. In frameless installations, details are not minor—they’re monumental.
Conclusion
A frameless glass shower door transforms any bathroom into a high-end retreat, but its successful installation hinges on rigorous preparation, steadfast precision, and a disciplined process. While professionals make it look effortless, informed DIYers can achieve the same immaculate result—with patience and the right tools. Still, when in doubt or dealing with structural complexities, defer to seasoned glaziers who understand the nuances glass never forgives.