Installation of Overall Shower Room
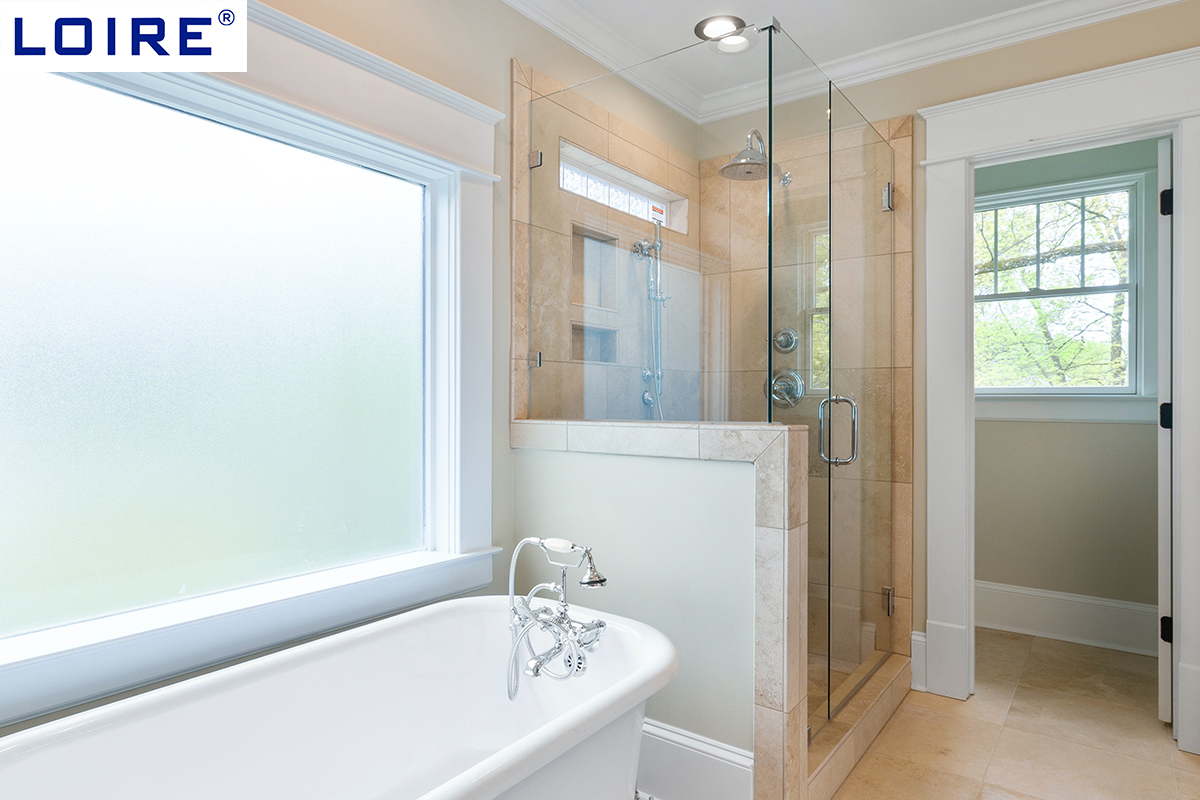
The overall shower room is one of the current trends in bathroom decoration, as it emphasizes the separation of dry and wet elements. It is more hygienic and aesthetically pleasing, making it one of the highlights of bathroom decoration. So what are the specific steps for installing an overall shower room? If you want to learn more, you can continue to read on.
1. Preparation before Installation of Shower Room
Before installing the shower room, first, prepare materials and tools. The shower room installed this time is a simple shower room without a chassis, so relatively few materials and tools are required. The materials used for material preparation include frames, tempered glass, handles, pulleys, and other accessories. It is best to have all these tools ready before installation. The tools used for this installation include a tape measure, pencil, impact drill, hammer, electric screwdriver, glue gun, manual screwdriver, wire pliers, etc.
2. Install the Bottom Basin
Firstly, the materials of the unpacked shower room should be properly secured to prevent damage. It is also important to avoid touching other objects, especially glass, which can easily break. It is best to have two or more people handle it at the same time and be careful. Then we need to prepare to install the bottom basin, assemble the various components of the bottom basin, adjust the horizontal position of the bottom basin, and wipe the inside clean with a cloth to ensure that there is no water inside. The hose can expand and retract with distance, firmly connecting the bottom of the basin to the floor drain. After installation, a water test should be conducted to ensure smooth and unobstructed drainage below.
3. Install Glass and Shelves
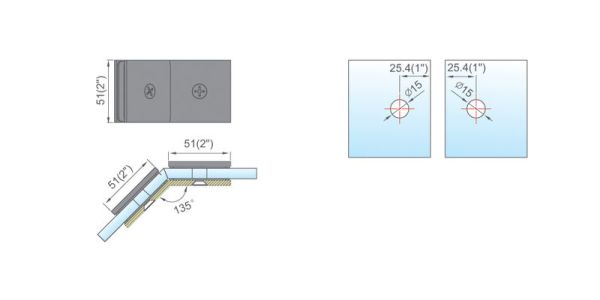
Use a pencil box ruler to find a location on the wall and punch holes with an impact drill. Then, tap rubber particles into the holes and lock the aluminum strip onto the wall with screws. Lock the glass clamp tightly at the drilled hole in the bottom basin and secure it with screws. Find the corresponding position to drill holes above the fixed glass, install (straight/inclined) fixed seats, and connect the top pipe. Fix it to the top of the glass with a bent pipe sleeve, and finally install a storage rack in the correct position. Tighten the layer plate nuts and fix the layer plate glass, keeping it vertical and horizontal.
4. Install the Movable Door
Install the hardware of the movable door and clamp the door onto the reserved hole of the fixed door. After installation, adjust the position of the axle core of the door clamp until the door closing feel is optimal. Then install suction strips or water-blocking adhesive strips on the side or below the glass as required. Seal the joints between the aluminum material and the wall, glass and bottom basin with silicone.
5. Inspection and Debugging
Check whether each part is comfortable and smooth to use, and make timely adjustments if any problems are found. After adjustment, tighten the corresponding screws to make the entire shower room more secure. Clip the decorative aluminum strip into the wall aluminum material to ensure its neat appearance. Finally, the entire shower room needs to be wiped dry with a cloth.