Simple Steps for Installing Bathroom Mirror Headlights

Do many people think it is necessary to install the bathroom mirror headlight before the bathroom decoration? In fact, it is necessary. The installation of bathroom mirror headlights can increase the brightness in front of the mirror when the light is not good so that we can see ourselves better when sorting out our appearance.
The price of mirror headlights is similar to that of other lighting equipment, which is not very expensive. Today, I would like to share with you the detailed installation method of the bathroom mirror headlight. The bathroom mirror headlight is easy to install and even can be installed by yourself.
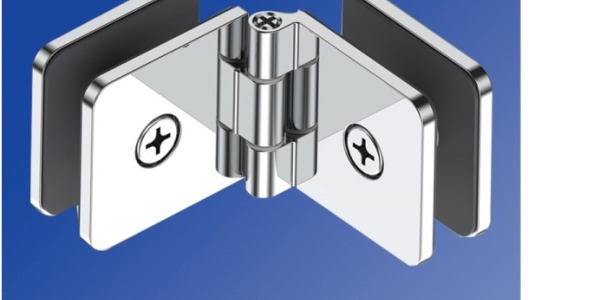
Step 1: The first step is to compare the headlamp bathroom cabinet mirror of the wall panel on the wall, and conduct a horizontal test with the horizontal one, then draw a hole location mark, delete the wall panel, the hole location of the hole and an electric drill, install the embedded parts, and then repair the wall panel and fix it with screws. The tools required for installing the front lamp of the rear-view mirror include an electric drill, a screwdriver, and insulating gloves at the heel and the front of the rear-view mirror. The pendant lamp board and lamp body are usually used.
Step 2: Place the lamp suspension plate in the position where it needs to be installed. Generally, the connecting power hole is reserved in the middle. Then, mark the top line of the lamp panel and the position of the mounting hole with a marking pen. Then drill the marked holes with an electric drill. Then, the suspension plate should be aligned with the position of the hole (where it should be installed horizontally). Then, fix the hanging plate with a screwdriver.
Step 3: Finally, make sure that the power supply is turned off, then wear insulating gloves (just in case), connect the power cord reserved for the lamp at home to the lamp drive power cord, and wrap the power cord with insulating tape to prevent electric leakage and electric shock. Align the front lamp body with the screw hole on the hanging plate and the screw buckle of the hanging plate, fix the lamp on the hanging plate with screws, and then hide the exposed connecting lines.
The price of mirror headlights is similar to that of other lighting equipment, which is not very expensive. Today, I would like to share with you the detailed installation method of the bathroom mirror headlight. The bathroom mirror headlight is easy to install and even can be installed by yourself.
Step 1: The first step is to compare the headlamp bathroom cabinet mirror of the wall panel on the wall, and conduct a horizontal test with the horizontal one, then draw a hole location mark, delete the wall panel, the hole location of the hole and an electric drill, install the embedded parts, and then repair the wall panel and fix it with screws. The tools required for installing the front lamp of the rear-view mirror include an electric drill, a screwdriver, and insulating gloves at the heel and the front of the rear-view mirror. The pendant lamp board and lamp body are usually used.
Step 2: Place the lamp suspension plate in the position where it needs to be installed. Generally, the connecting power hole is reserved in the middle. Then, mark the top line of the lamp panel and the position of the mounting hole with a marking pen. Then drill the marked holes with an electric drill. Then, the suspension plate should be aligned with the position of the hole (where it should be installed horizontally). Then, fix the hanging plate with a screwdriver.
Step 3: Finally, make sure that the power supply is turned off, then wear insulating gloves (just in case), connect the power cord reserved for the lamp at home to the lamp drive power cord, and wrap the power cord with insulating tape to prevent electric leakage and electric shock. Align the front lamp body with the screw hole on the hanging plate and the screw buckle of the hanging plate, fix the lamp on the hanging plate with screws, and then hide the exposed connecting lines.